
Soooo.. the keen eyed might have noticed in the Unreal shot from the last post that something weird was going on with the Materials.
Well that was our normals pointing the wrong way.
Lesson of the day: Check your normals before overeagerly exporting your mesh 😄.
How to fix them Normals
So first of all let’s have a look how to check your normals in the first place. I am using Blender 2.91.
In your interface you have the option to show Face Orientation. This is very helpful as it will colour the whole object. We are gunning for Blue – Red means bad times. If your normals are oriented the wrong way and you are not using a two sided material the mesh will be missing its outer faces and get rendered the wrong way.


So now your object ideally looks like this. We like the blue tones.

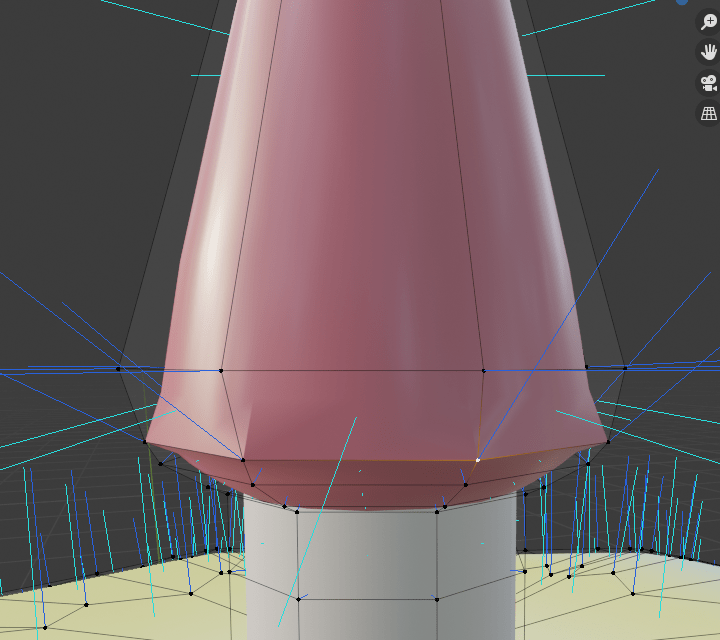
But good chance that if you are a beginner like me, it might look like this.

In Edit mode you have also the option to show face, edge and vertex normals in the same menu just a bit below. This shows the actual normal vector in your viewport.
Ok and now? Turns out this is super easy to fix actually.
First make sure you do NOT have any subdivision surface modifiers active. Either apply them or get rid off them for now, because there is a good chance they will break things when fixing your normals.
Like this little eccentric behaving group of vertices.
So once you got rid of your subdivs, one way or another, enter Edit more, select what parts you want to change the normals for – usually this will be everything so you can just select all.
Then we go under Mesh->Normals and for me it was enough to just flip them, but you can play around with the different options if you feel like it.

And lo and behold we got our all blue-ish Umbrella with correct facing normals.
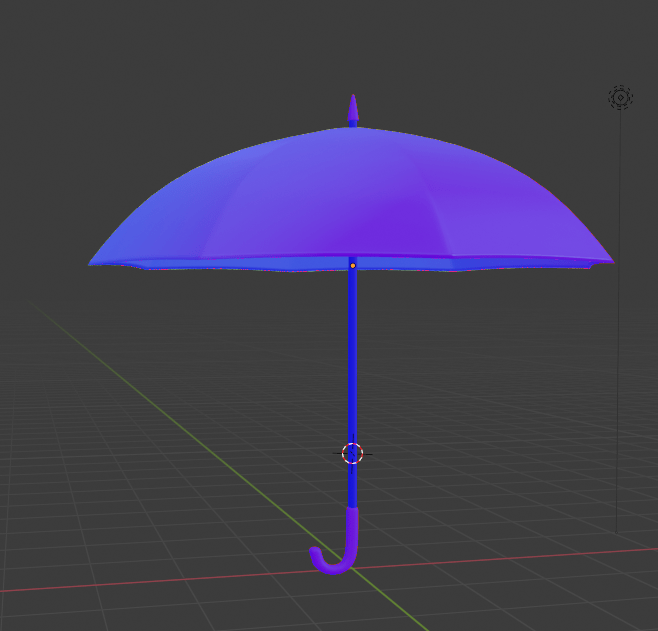
And it should render correctly in engine.

So do the totally normal thing and check your normals 😉. Have a lovely day internet strangers 👋.

Leave a comment. (Email and Name are not required to be filled in)