
I think, as everyone that ever played a cozy life sim knows, one quite common aspect is being able to change your outfit to show off your brilliant and personal taste in fashion😎.
But how can we make this actually happen in our game?
Proof of Concept Results
Let’s look at the current end result first, so we get to look at some pretty pictures before the walls of text 😉.
(Just a heads-up, this is the current proof of concept but is still missing things like handling of clipping between clothes, which we will look at in the future.)
The Character Setup
The first thing you need to figure out here is what you want the player to be able to change. Can they change only whole outfits – so the whole body – or individual bits like trousers, shirts, shoes etc.
Small hint, one of these options will be much easier, cheaper (in sense of performance) and less overall work than the other.
Can you guess which one I went for? .. Yes, the current plan is that you switch and swap Hands, Torso, Legs, Shoes, Hair and Acessoires, because apparently deep down I want to work myself to death in Blender (or it’s just the girly girl within me wanting to make pretty clothes and play dress up – like the game dev version of playing with Barbies) 😂.
Once you have decided what parts of your character can be changed individually, you should also have a think about how you want to go about working with your modular character in-engine.
In Unreal there are three main ways you can chose from. There is some nice documentation you can read up on here.
Tldr,; Here is Epic’s comparison chart, as a summary and to give you some context.

For my use case, I need morph targets and anim dynamics so I will have to go for the most expensive ‘Copy Pose’ approach.
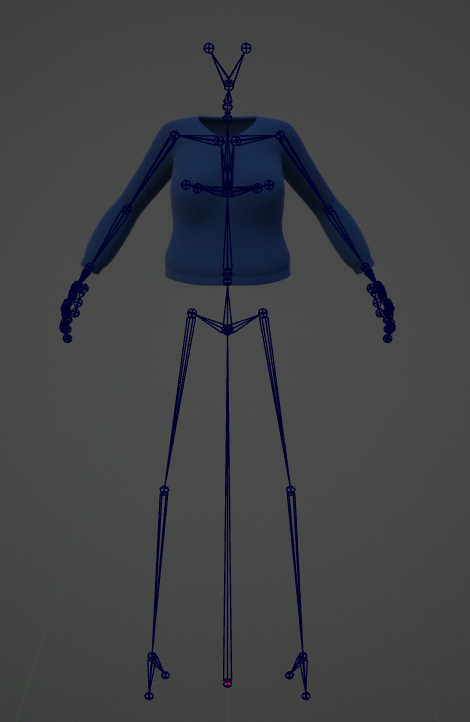
How this works is that we add SkelMesh components for each part you want to change individually and then parent them to a ‘root’ SkelMesh.
I chose the ‘Torso’ for this, but I do not think it makes much of a difference which one you pick. Having all your other parts attached to the ‘root’ is important to make sure your animations update correctly and seamlessly at runtime.
The only thing I do not recommend is to pick an invisible root mesh and nest all your visible parts underneath, because that can cause – under the right circumstances – a few issues at runtime where the character might be falsely flagged as not rendered and no longer update its animations.
So it might look something like this:

Each part of your body has to share the same base bone hierachy of your ‘root’ skel mesh. You can add more leaf bones but the base needs to be the same, so that poses/animations can be copied from your ‘root’ skelmesh to all the parts correctly.
For example here are some examples from my character.


Some leaf bones you might want to add could be hair strands that you procedurally animate at runtime, little dangly bits hanging of your outfit or if you have a more complex facial setup you want to keep those bones in the head asset.
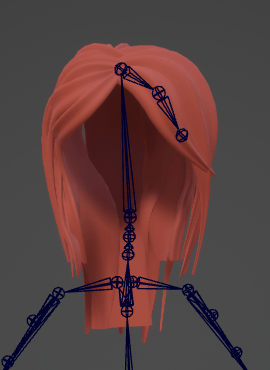
The only exception I have from this setup are things like the earrings. These are skel meshes that are simply attached to a bone on body skeleton but don’t have to share their animations – which means they do not need to share the bone setup either.
Once you filled in all your body parts, the next thing you will probably want to do is setting up the animation side of things.
The Animation Setup
The ‘root’ skel mesh component will also have your ‘main’ animation blueprint. Here you do 99% of your anim handling for your character.
The only thing that has to go into the animation blueprint of the other body parts is:
1) copying the pose of the ‘root’ skel mesh
2) animate any additional leaf bones if applicable
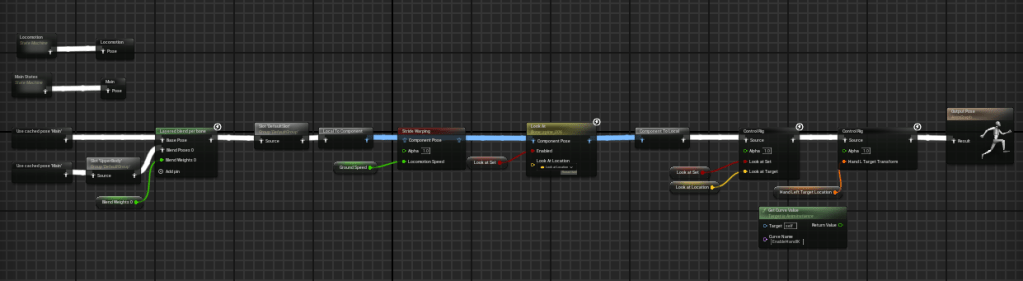
For example my main anim blueprint handles things like locomotion and look ats. (Currently my main anim blueprint also handles procedurally moving the eye bones around, but that could feasably be in the anim blueprint of the head instead)
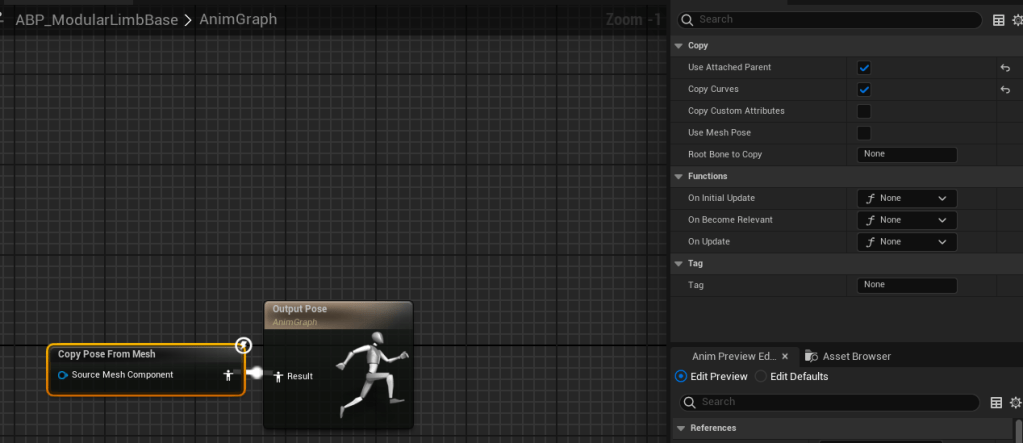
And most of my body parts actually share the same animation blueprint, because they do not need any custom logic, they simply need to copy the ‘root’ pose. But custom logic could and should go here.
Now if you play an animation on your ‘root’ skelmesh, all your body parts should animate correctly with it.

Little Tip
As an extra tip, when you are previewing animation assets with your chopped up meshes it can be a bit problematic to see what is actually going on.
You can work around that in two ways:
1. Create a Mesh Collection for Additional Skel Meshes.
You can do this in the Preview Scene Settings in the Animation Persona View (The window that opens when opening a animation asset).
Per default a ‘UnsavedCollection’ will get added. You can add additional meshes to it and save it to use it later.
This can get a bit cumbersome though if you have many combinations of meshes you want try out with each other.

2. Have a ‘whole body mesh’ that is used for previewing.
This is what I do at the moment. Instead of adding additional skeletal meshes to whatever it picked as the preview mesh, I change the preview mesh to a whole body instead.
Again, this mesh needs to have the same skeletal structure as your modular character parts.
This works the best for me at the moment because it’s rather easy and simple to set up.
In the future, I want to show you guys how I created the dangling physics-based earrings, because making physically animated things is just pure joy! I could run and jump around all day and watch them do their thing 😁.
Then I need to tackle the clipping of different clothing items with each other – for which I already have a plan but need to test it out.
Aaaanyways… that is enough babbling from me. It’s 3am and the bed is calling 😴😄.

Leave a comment. (Email and Name are not required to be filled in)