
And welcome to Week 2, everyone 👋👋👋.
Here is Week 1 for curious minded people 😄.
If you saw last week’s post, you know we finished laying out our level in 2D. So this week, it is time to actually make use of it for our 3D game.
Putting the 2D into 3D
Now we have our 2D template for our 3D map we have to get it into a usable resolution, so I took many differently offset screenshots of the zoomed map in GameMaker and then stitched them together with an image editing tool – resulting in about a 4K-ish sized image.
Otherwise, when you stretch it over the size of a landscape it would be way too blurry and pixelated to be of any real help.

Flat Map Layout
Ok, so far so good.
Now we can figure out distances between things and make sure they make sense from a gameplay perspective. So we drop in our player and go for a lil walk 🚶♀️➡️.

That seems about right for now. Worst case, we have to shuffle some stuff around later – not a biggie.
Fortress Mockup Timelapse
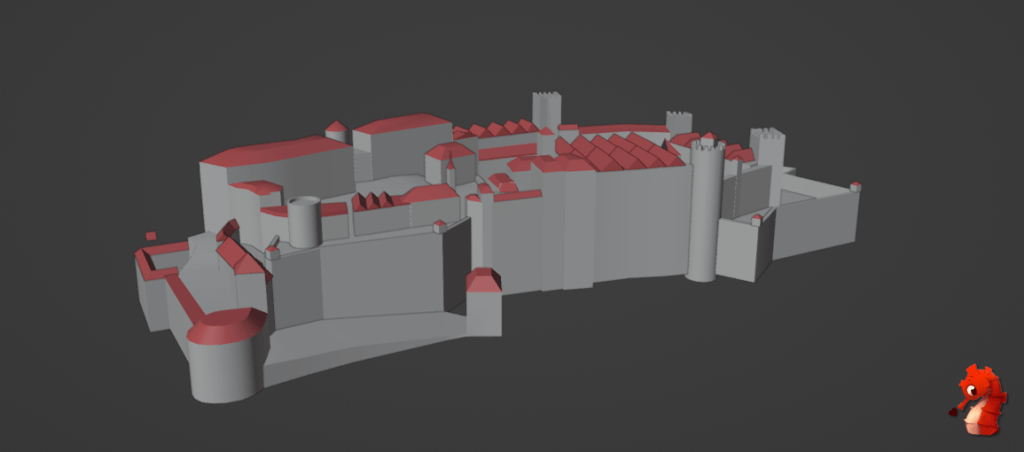
To get a rough idea of how big our fort should be and how large, therefore, our central hill needs to be, let’s do a quick mock-up.
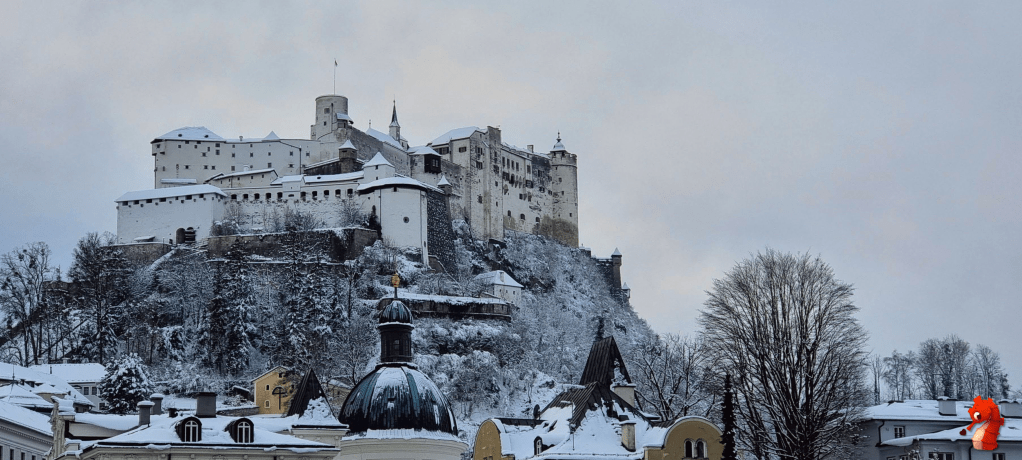
My inspiration is Festung Hohensalzburg in Salzburg, not only because it is a beautiful building, but I also grew up with this fort being the central landmark of our town and I’d like to share this with the players – it is ‘quintessential Austrian’ for me.

Here is a timelapse of me mocking up a fortress mesh. Don’t come after me about the crazy topology in places—it’s just a quick and dirty placeholder mesh, after all 😉.
Landscaping
Now it’s time to get into the meat of things and start shaping our landscape and putting down some placeholder buildings, to build a more accurate understanding of the space.
It makes sense to start with significant landmarks that will influence the layout of the rest of the map, such as rivers and hills—especially the central hill where the fortress lives.
Here is a little timelapse of some of the landscape work.
After a little bit, I also noticed that just a plane with the 2D map on it is not the best solution, since anytime you go higher than the plane you lose the image.
Instead, doing a little material magic (maaaybe with some help to figure out some UV math 😉), we project the 2D map directly onto the landscape which allows it to deform with it.
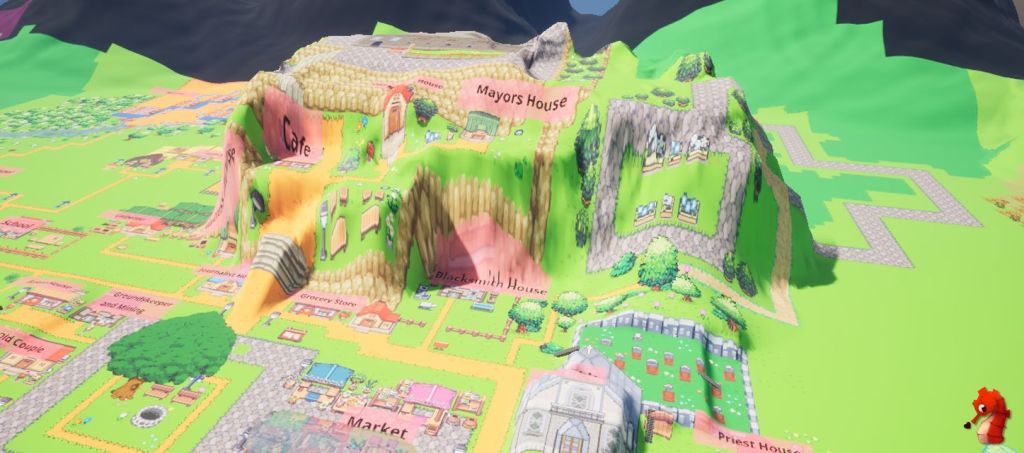
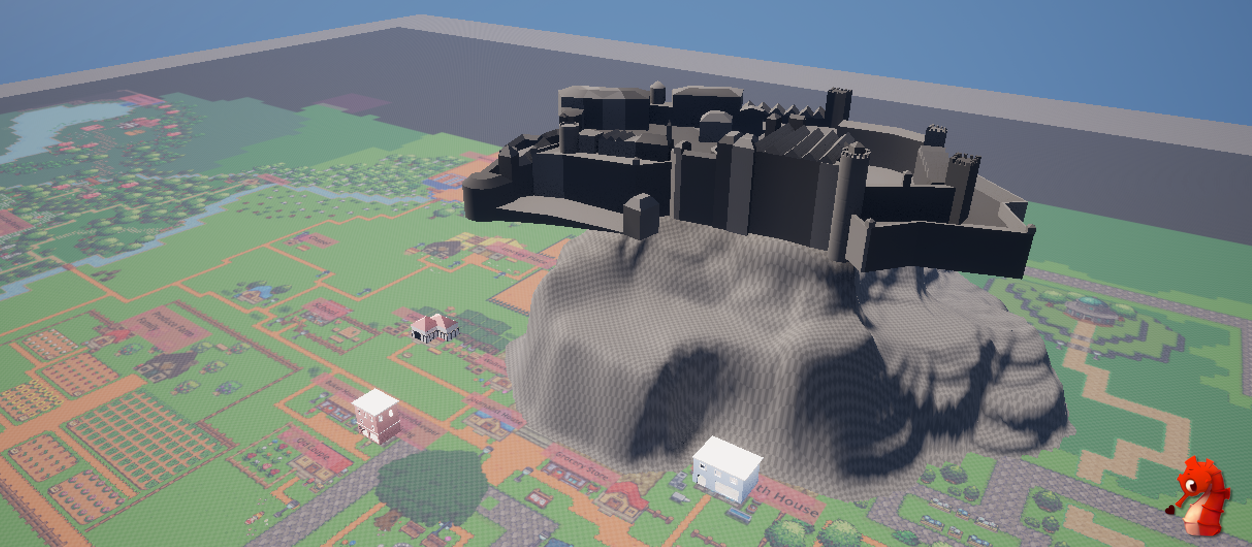
Fortress Placement
Now we test if the fortress fits our designated space on the map… and it really does not.
And that’s why we test these things out!
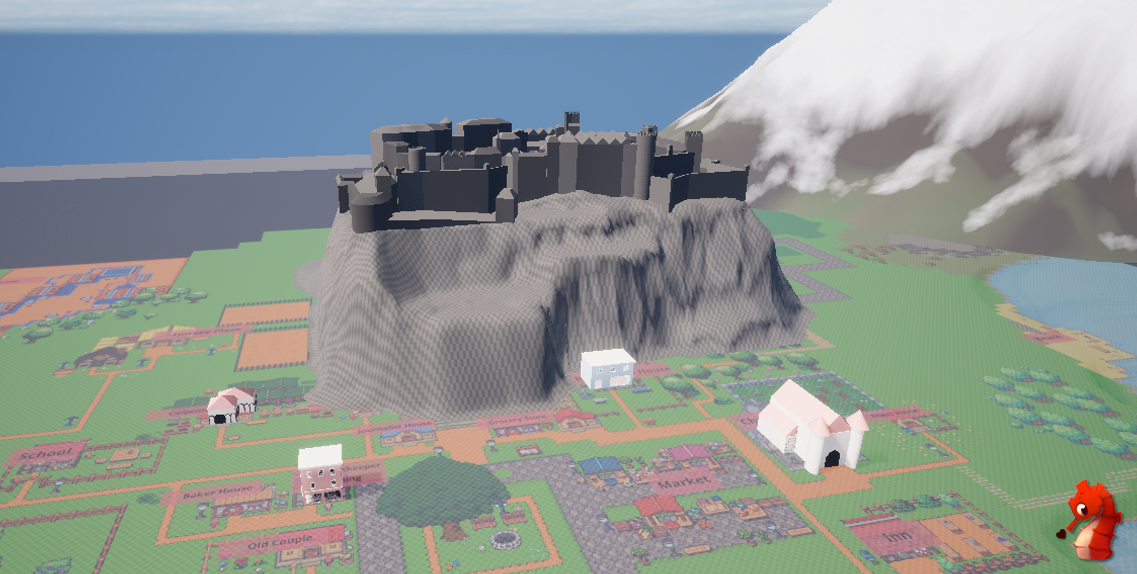
After some small adjustments, the fort looks much more comfortably perched on the mountain.
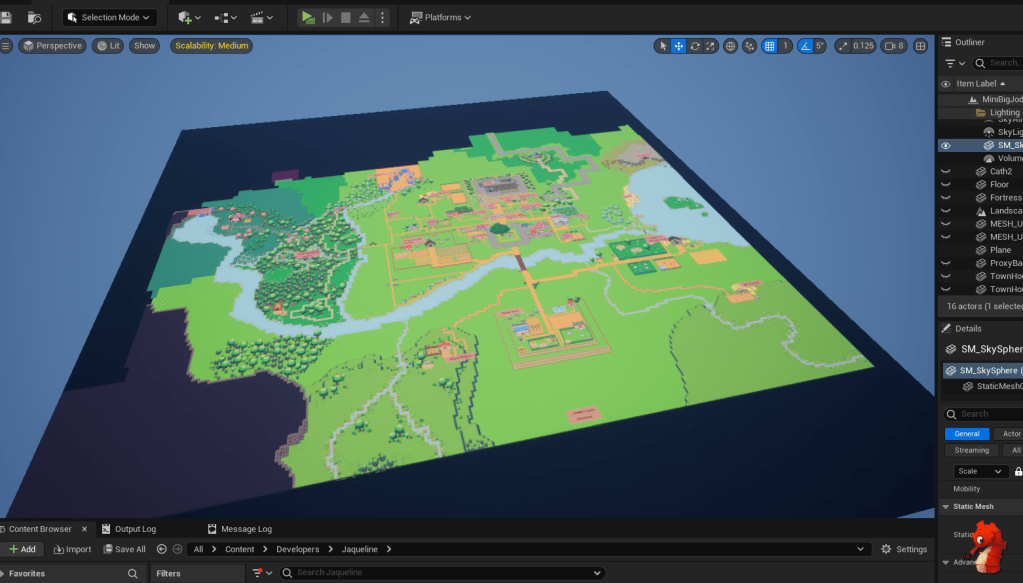
After many more hours of messing with the landscape, placing down placeholder meshes and running around, testing things out – this is the result so far this week.
It’s somewhat coming together, but there is still plenty more to do!
See you hopefully again next week, for even more updates. Maybe we carry on with level design bits, or we pivot to something a little bit different.
See ya!! 👋✨

Leave a comment. (Email and Name are not required to be filled in)