
In Part 1 we looked at how we can go about making tree meshes, now we want to change them with the change of seasons.
Seasonal Manager
First, we need to add the concept of seasons – this is really rather straightforward and I simply added a Seasonal Manager.
In Unreal you can add something called Subsystems, which are basically singletons whose lifetime gets controlled by certain parts of the engine e.g. a World Subsystems exists for as long as your world exists, GameInstance Subsystems as long as your GameInstance (so pretty much for the whole game) and so on.
More info on it here.
So for the Seasons Manager you’d want either a World Subsystem or a GameInstance Subsystem if you plan to have different levels and want to keep the same instance across changing levels.
The contents of the manager will depend on your game, but for me it’s rather simple, you need something that says what the current season is; how to change to the next season; and some delegate to inform other classes when the season has changed.
So it might look something like this:

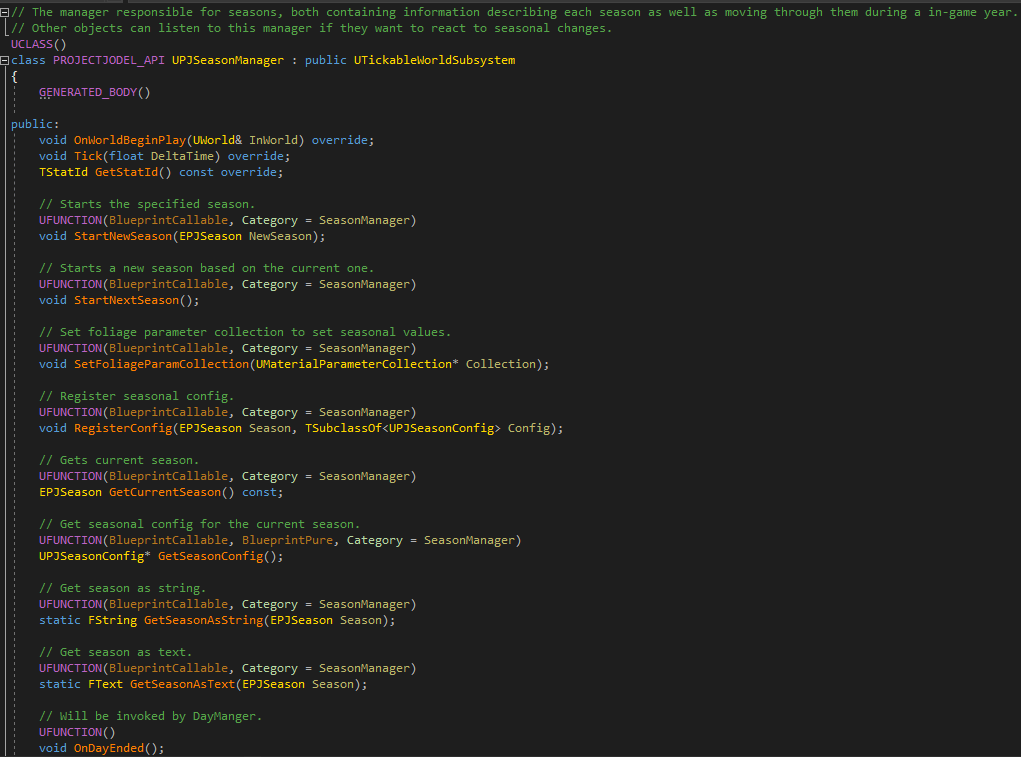

As you can see there are some other bits in there like season configs which describe the properties of each season (amount of days per season, sunset and sunrise hours etc.) and we are also setting a material parameter collection – which will become important when we look more closely at the foliage side of things.
Currently, this class is a world subsystem, but more likely it will be changed to a GameInstance one in the future so we can travel between different persistent levels while maintaining the same season data.
Seasonal Component
The specific relevant content for this request, if necessary, delimited with characters: To actually drive the seasonal changes on each foliage actor, we have a seasonal component – which is also used for any other non-foliage actor to control their seasonal behavior.
It handles all the various visual changes that we might want throughout the seasons, for example:
– Changing Meshes
– Hiding and Showing Meshes (instantly, dither or scale)
– Changing Materials
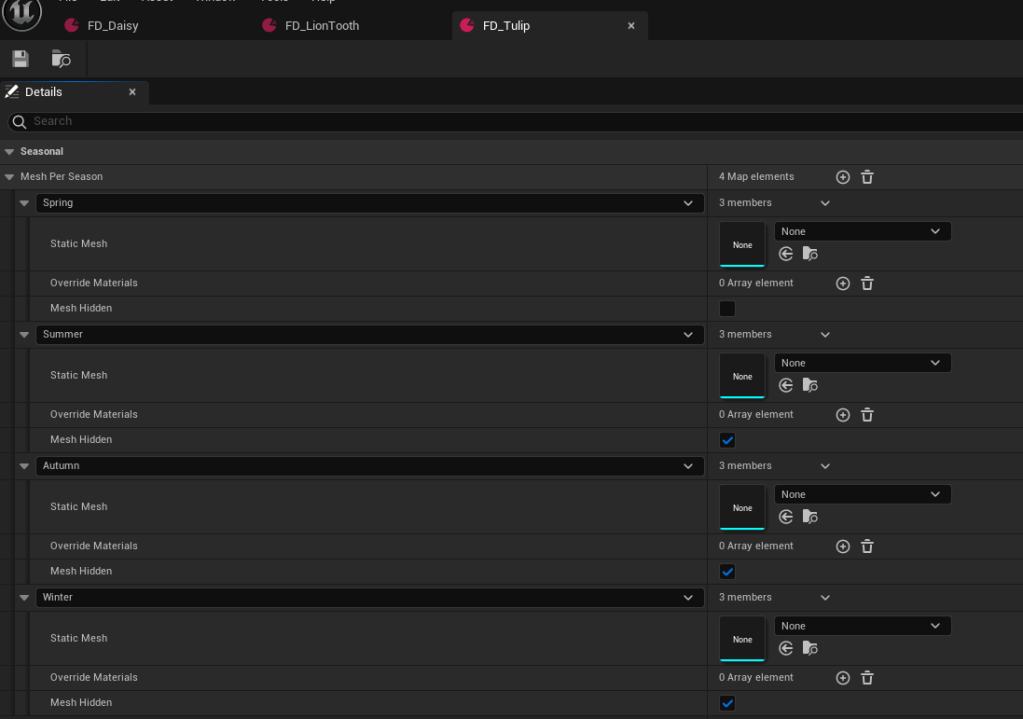
Most of the visual changes can be set up in a data asset, that the component references, and might look something like this:

You can see that in Spring we change the mesh to a flowered apple tree, Summer and Fall stay the same since the changes there are made within the material and in Winter we change to a bald tree with the ability to be snow covered.
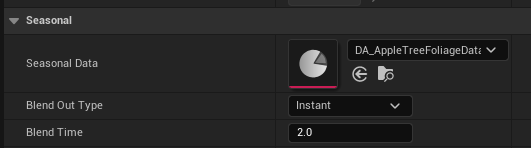
On the component you can additionally set how you want visual changes to occur, they can be instantly, the material can dither (aka fade) in and out or we can scale the mesh in or out – which I found works really well for flowers to give the impression they are growing.
For trees instant changes work the best in my opinion.
Another example could be the tulip seasonal data, which never changes mesh or material but simply states that they should be hidden anytime but in spring.
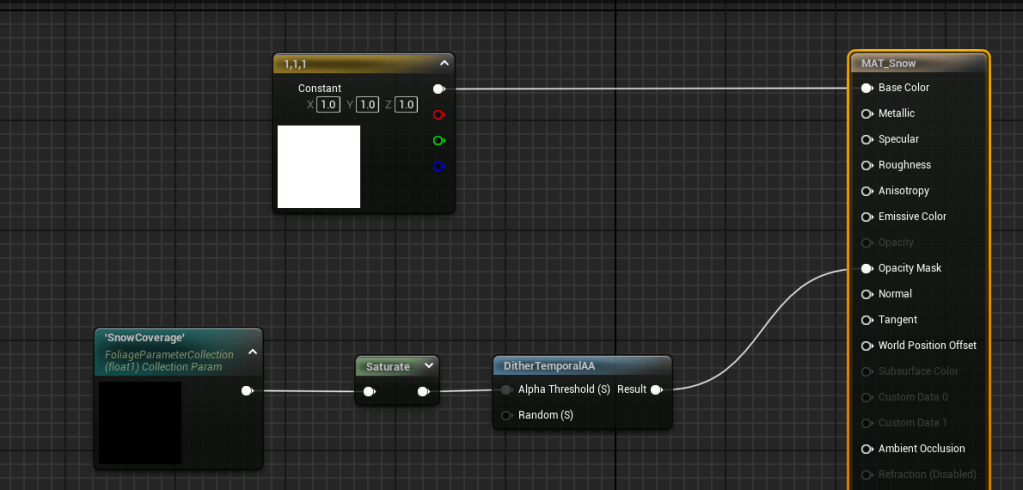
The last part of the equation is the previously mentioned material parameter collection.
The seasonal manager sets what the current season is in the collection, so materials can react appropriately. For example, let’s have a look at one of the tree mats:


Based on the season we can choose different textures and subsurface colors at runtime.
Similarly, we can check the snow coverage in the material param collection (filled in by the weather manager) to drive snow visibility.
And since I still want to use Unreal’s foliage system to place my trees and flowers – to make use of handy things like their placement systems, distance culling, and scalability settings – I simply made Foliage Actors which can use a custom blueprint class as a base.
However, keep in mind that you won’t benefit from mesh instancing as you would with just mesh foliage. So anything that does not have to change with seasons or whose changes can be fully handled in the material only, make sure to place as a normal mesh foliage for a more optimized result!


And in my case the blueprint I place, has the seasonal component in it.
So now that we have the code and setup sorted, and we have our meshes, we will look at the results in Part3.
Have a lovely day, internet strangers! 👋

Leave a reply to gavcostello Cancel reply